As you start hitting your stride with affiliate marketing and leveling up your skills, there is an important discipline to be explored – experimentation. Your affiliate links could be making you greater commissions if you can figure out what to tweak.
Trusting your gut is essential in the early days of your adventures in affiliate marketing, when “anything is better than nothing” and “perfect shouldn’t get in the way of done” reign true. Eventually, you may find that your head and your gut disagree on things. When this happens, it’s a good time to start running some experiments with your affiliate links to discover what truly performs best.
In today’s rapidly evolving world of affiliate marketing, there are dozens of things to test that can make a real difference to your bottom line. For example:
After Amazon’s commission rate changes, is Walmart a higher-yielding affiliate program?
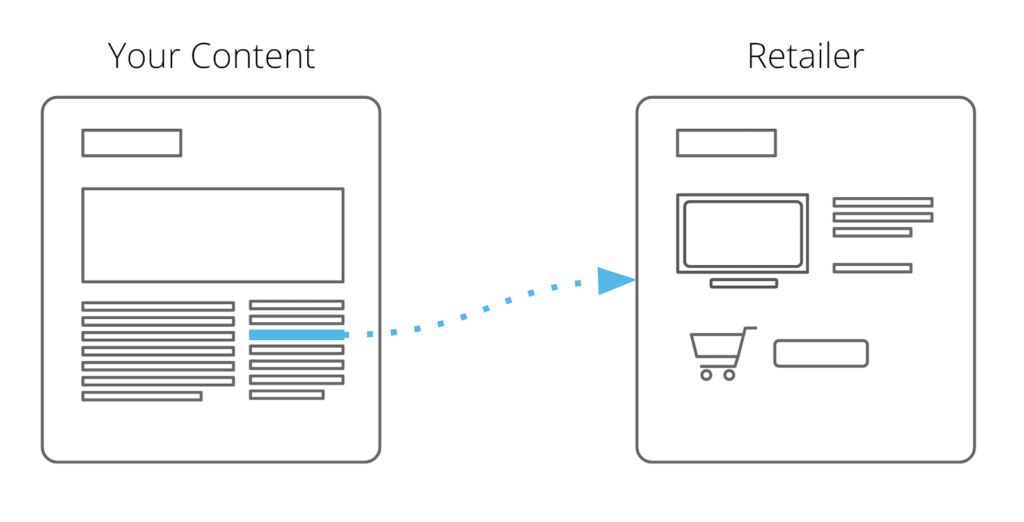
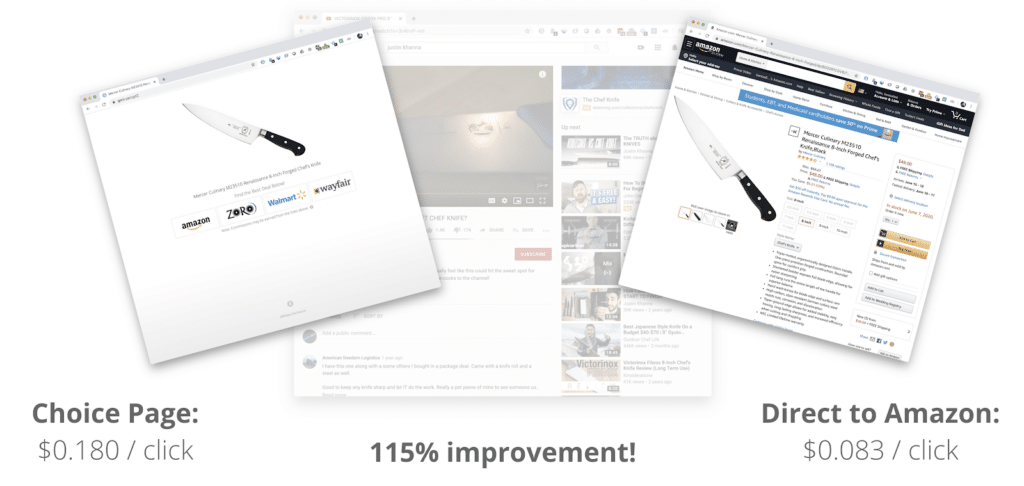
Will using a Choice Page with multiple retailers convert better than using a direct link to Amazon?
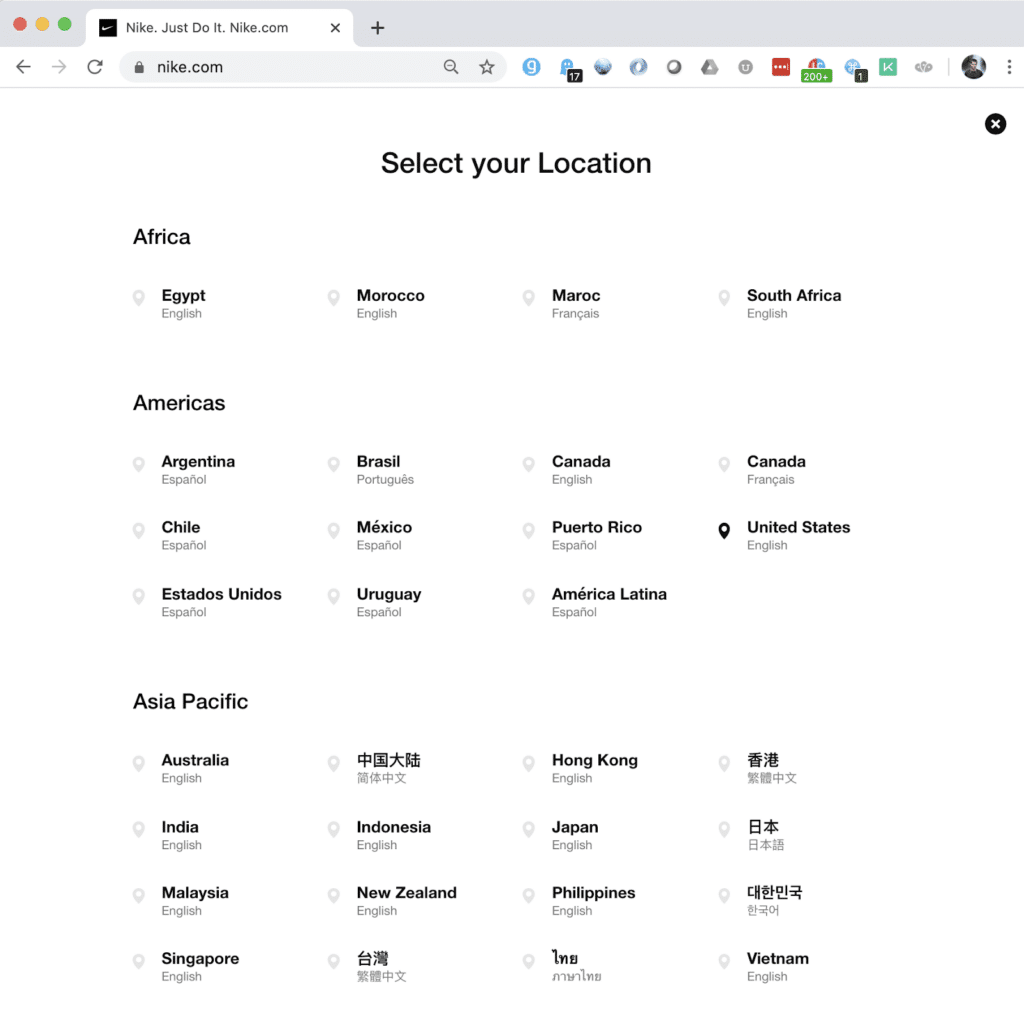
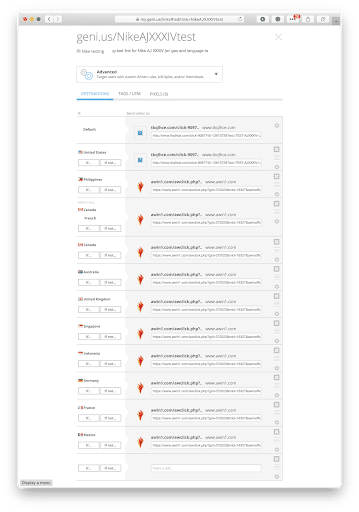
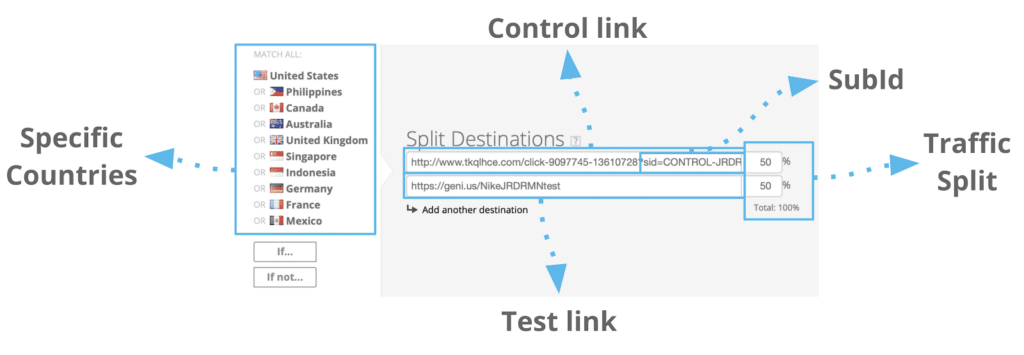
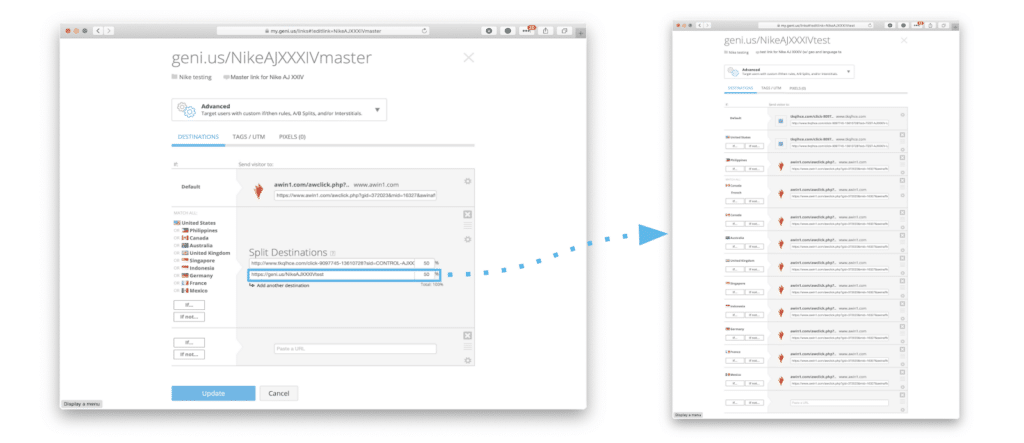
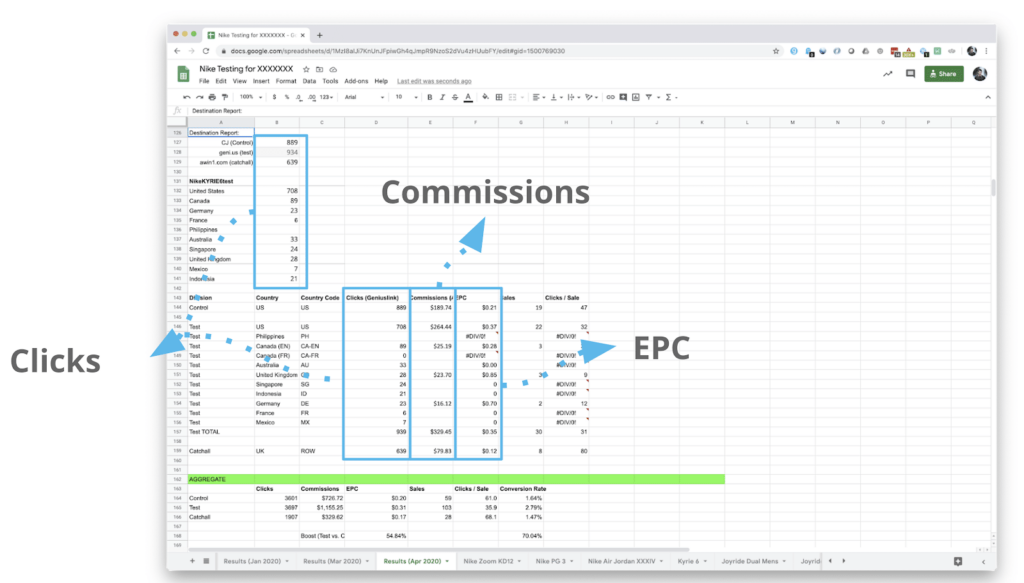
Nike is a global brand and has regional storefronts, therefore will a geo-targeted link perform better than the affiliate links provided directly from CJ?
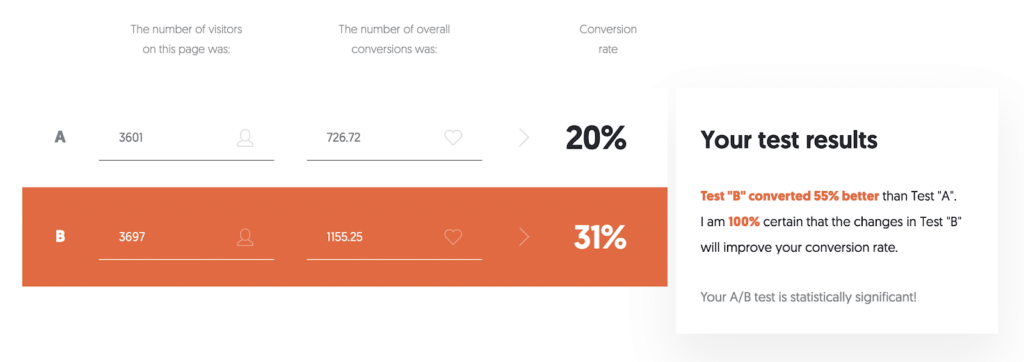
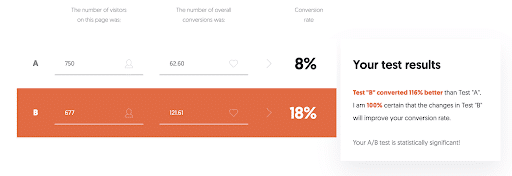
Experiments can take many forms and one we often hear about is running A/B — or multivariate — tests, on your website to see what converts best. If you have a website I wholeheartedly agree. It’s even something we’ve done on the Geniuslink website in the past.
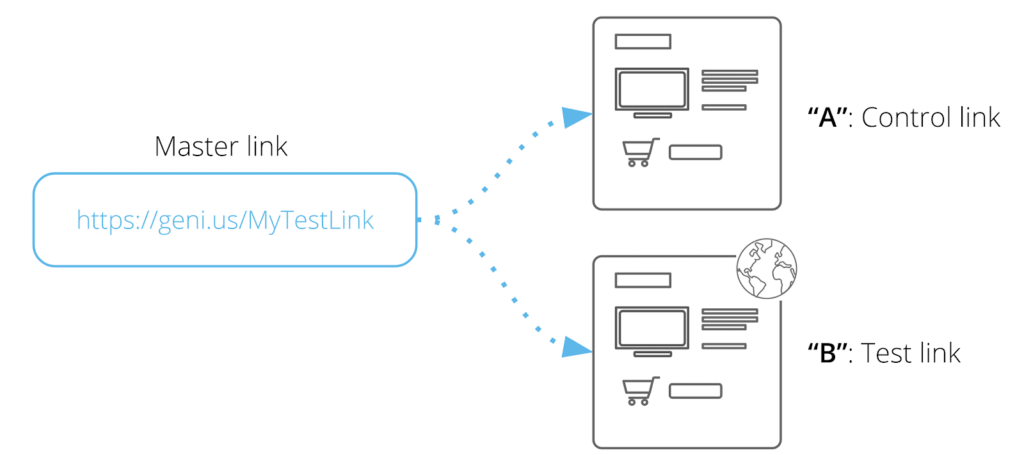
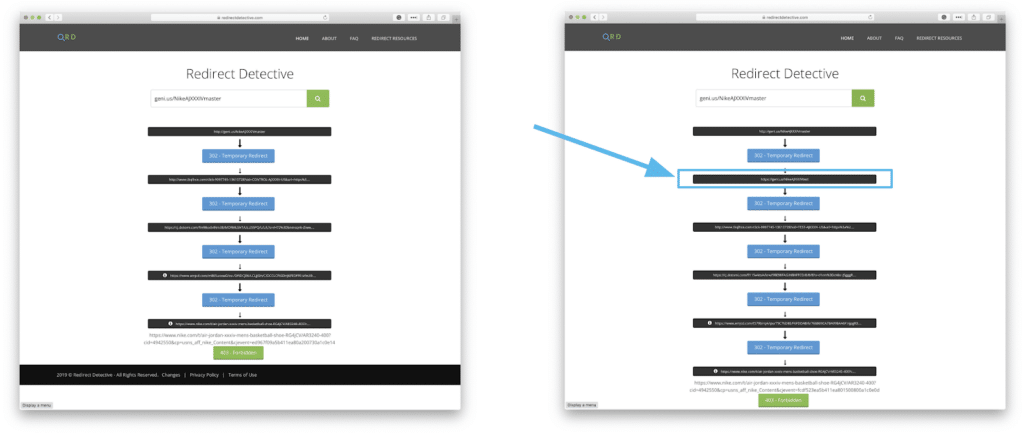
Traditionally, running experiments (via one of the various javascript-based testing tools) primarily focuses on making tweaks to your website. Today we are focusing instead on testing the destination of your (affiliate) links, which is managed via a link management tool (Geniuslink) and can be explored in parallel with your website optimization tests.
Also, quite simply, a javascript-based testing tool simply doesn’t work for those that share links from their YouTube channel, your Twitch stream, Pinterest, Facebook, and Twitter, so if you are looking to run experiments from your social channels then you’ll need to use a link management tool.